
Annual Reviews are your chance to reconnect with members, make sure their coverage still meets their needs, and uncover opportunities for additional protection. This guide walks you through the process step-by-step inside CRM 10 — with tips and screenshot placeholders to make it easy to follow.
- ✅ Connect to the VPN — CRM 10 won’t work without it.
- ✅ Log in to the Production site (not training) for real-time info.
- ✅ Make sure your CTI password matches your VPN password.
- ✅ Clear your CRM 10 cache weekly (best on Mondays).
Tip: Always answer calls in CRM 10 — it ensures scripts and call recordings are saved correctly.
Before You Start: Log In
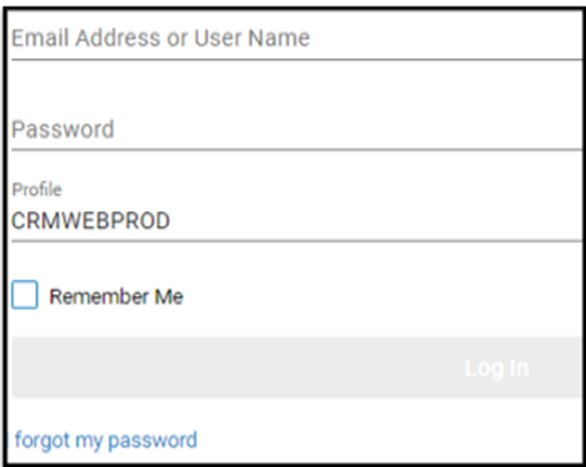
- Go to the Production login page.
- Enter your username and CRM 10 password.
- Approve the Duo push or enter the 6-digit code within 30 seconds.
- If prompted, update your CTI password so it matches your VPN password.
Step 1: Check Your Daily Planner
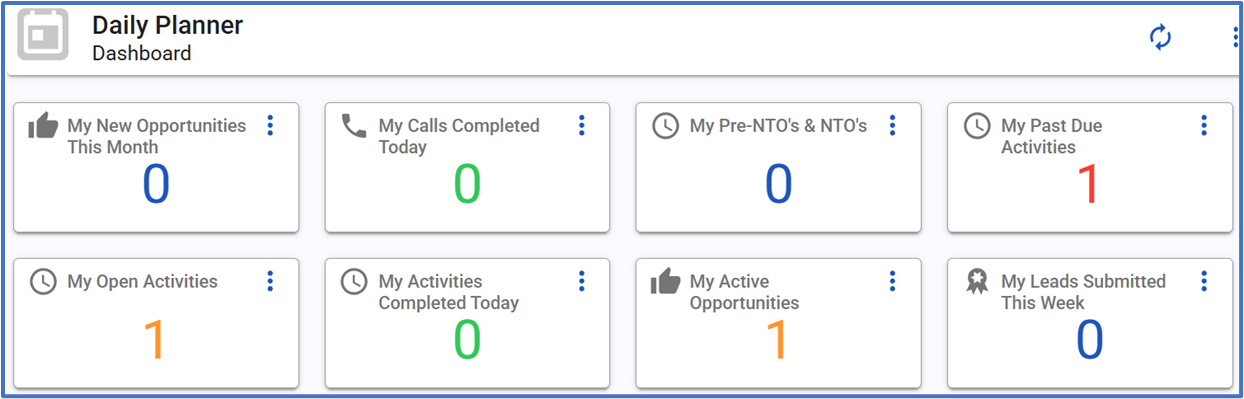
Your Daily Planner is your home base. It shows:
- New leads
- Activities due today
- Past due activities
- Active opportunities
Look for Annual Review calls or activities here first.
Field Agents skip to step 3.
Step 2: Open the Annual Review Script (Phone Call)
- When you answer an inbound call, the script will load on the left side of the call screen.
- If the wrong script appears, use the dropdown to select Annual Review Campaign.
- For outbound calls, click the green phone icon in the profile, select the number, and start the call
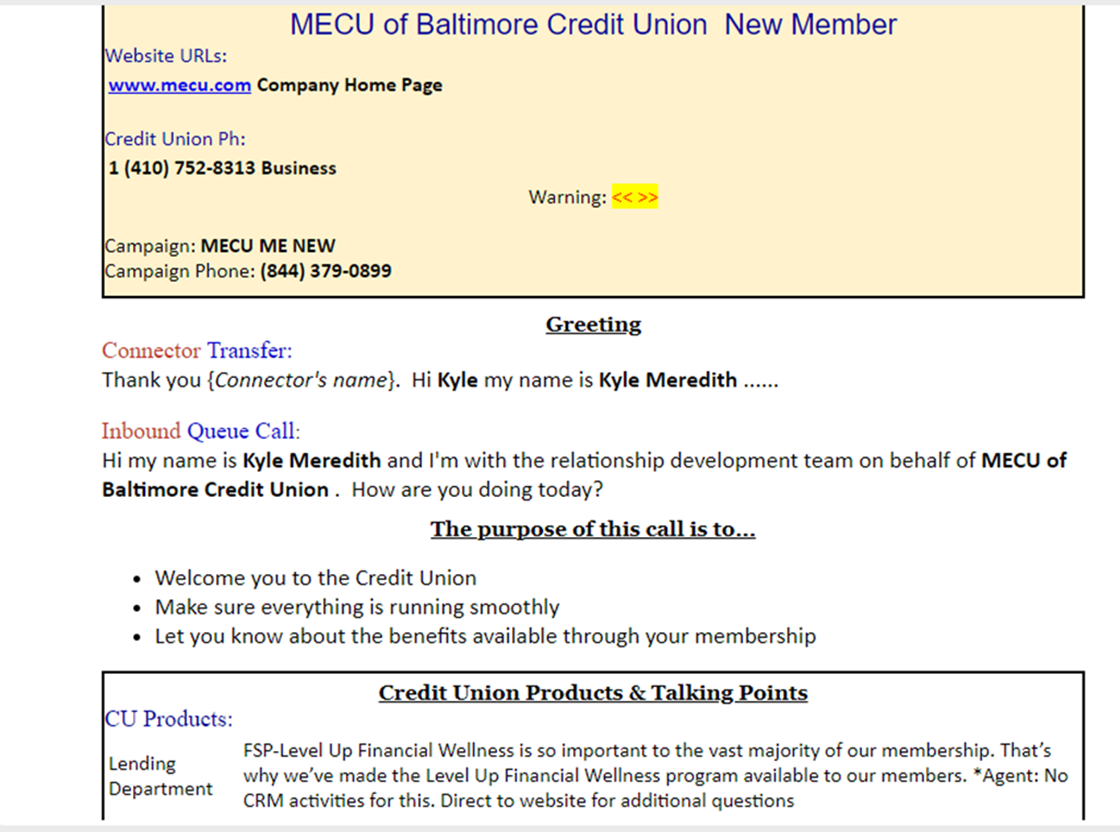
For a refresher of the Annual Review script click here.
Step 3: Find the Member Profile
Field: Use the Contacts search to find the member (by name, SSN last 4, etc.). Annual Reviews are only for existing members there is no need to create a new profile.
Phone: Click on the member's name (blue hyperlink) during a call to open their profile.
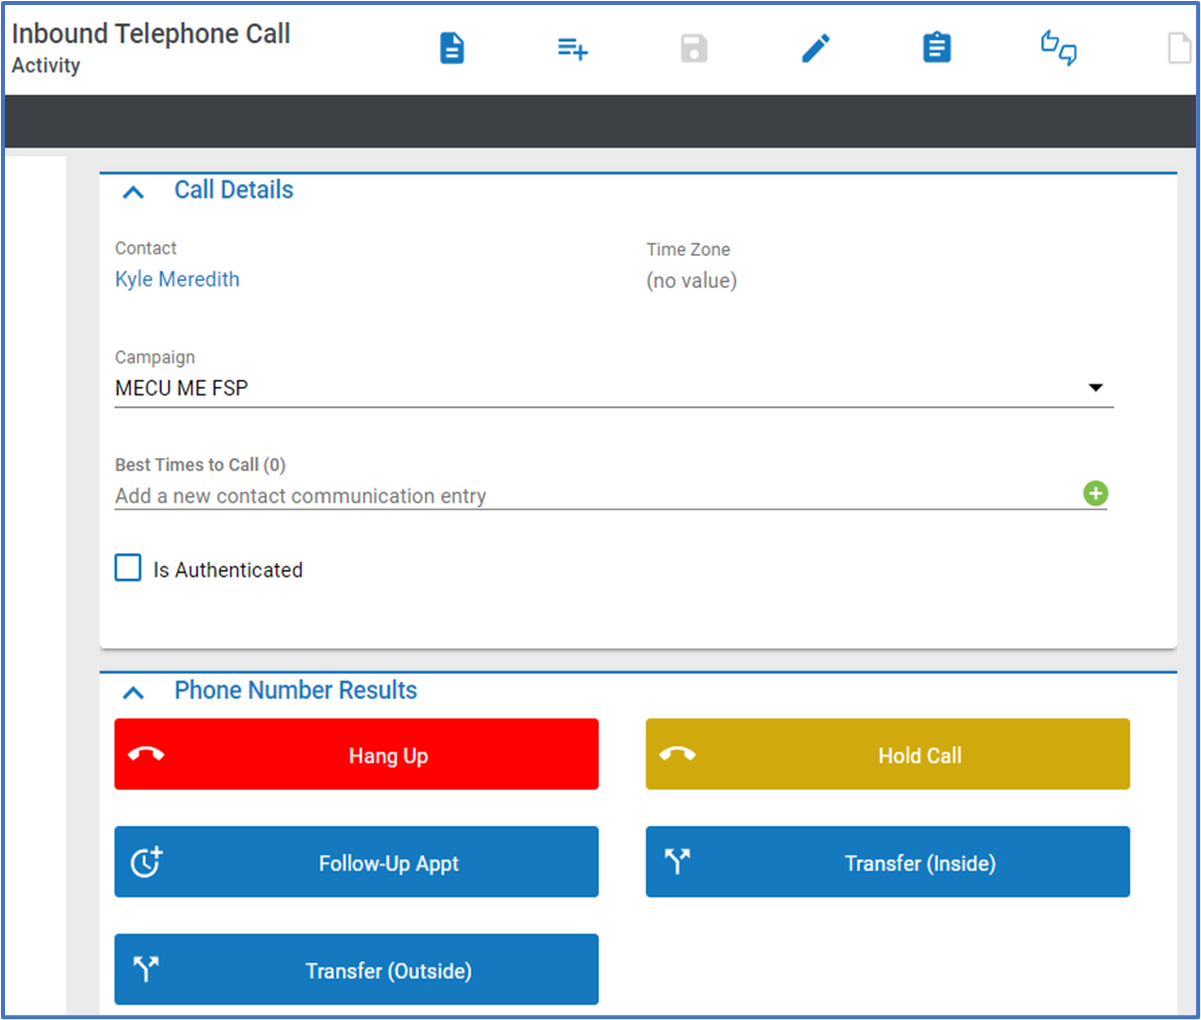
Step 4: Verify Member Details
Open the profile on the right side and confirm:
- Date of Birth
- Phone numbers and email
- Mailing address
- Credit union, employer, occupation
- Consents (click the Consents icon when updating)
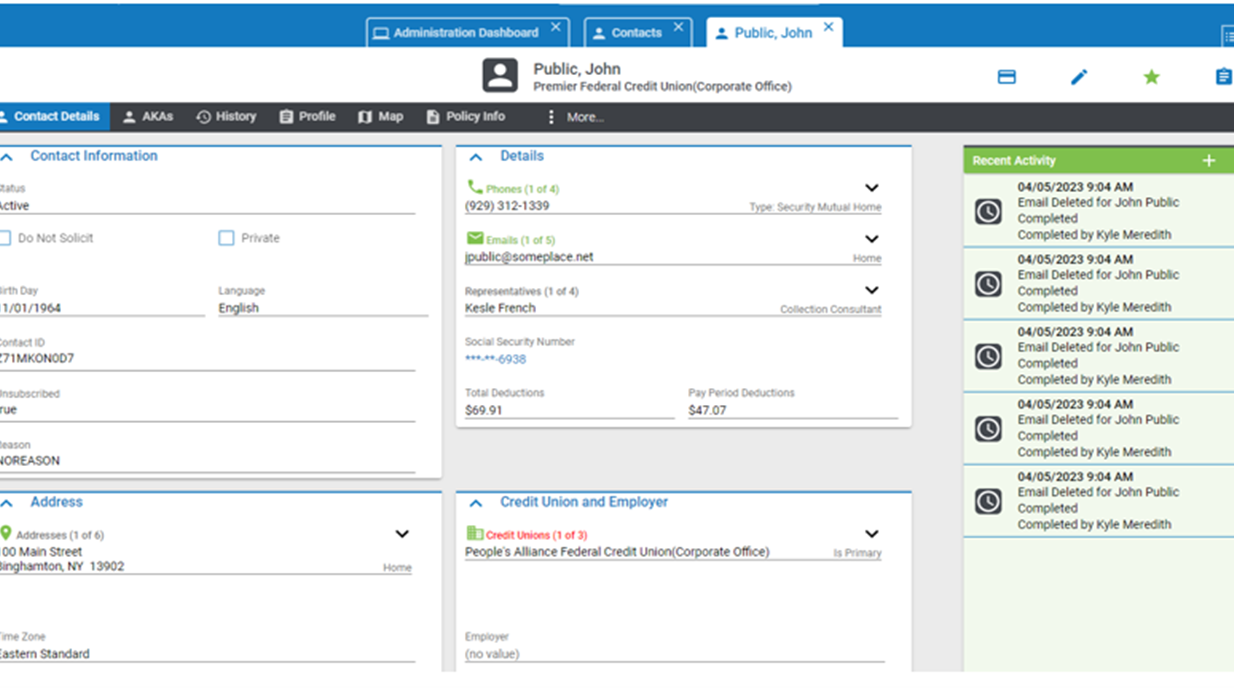
Step 5: Review Their Policies
- Click the Policy Info tab.
- Check:
- Active and inactive policies
- Face amount and benefits
- Policy status and sale date
- Use inactive policies as a chance to re-offer coverage.
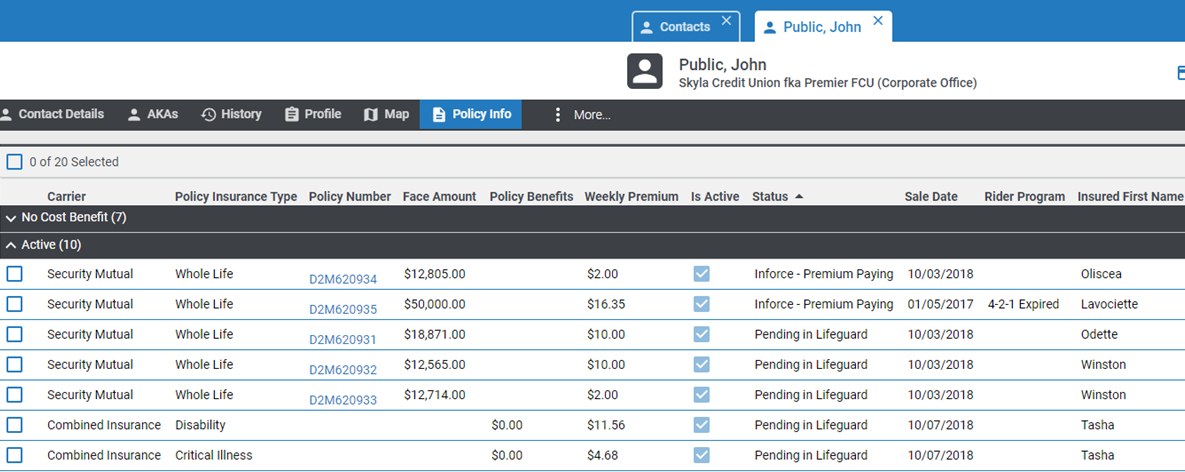
Step 6: Go Deeper
Click each policy number to see:
- Beneficiaries — ask “Are these still correct?”
- Payment dates — try to align with new policies
- Riders — discuss additional benefits they might need
Note: You can’t change beneficiaries directly, submit a request to the carrier with Policy #, Email, and Mailing address (P.E.M.).
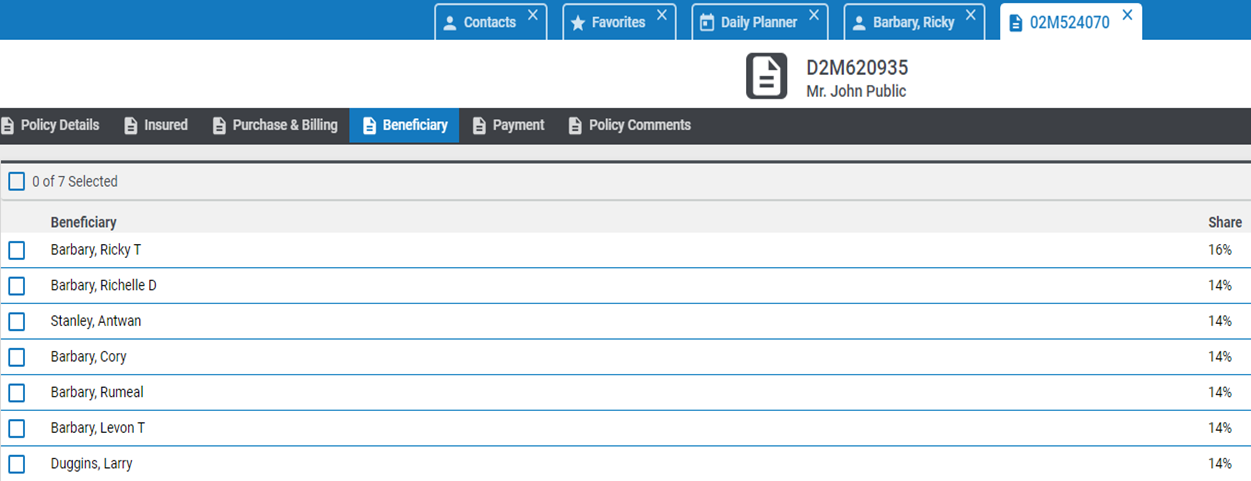
Step 7: Document Everything
Don’t create a new activity — the system already did that for this call. Just complete:
- Action – Already filled
- Result – Call outcome
- Notes – Be specific (who, what, timing)
Example of a good note:
“Member’s wife Abigail, 43-year-old smoker, teacher at Lincoln HS, interested in increasing accidental coverage to $200k. Follow up after payday on 8/15.”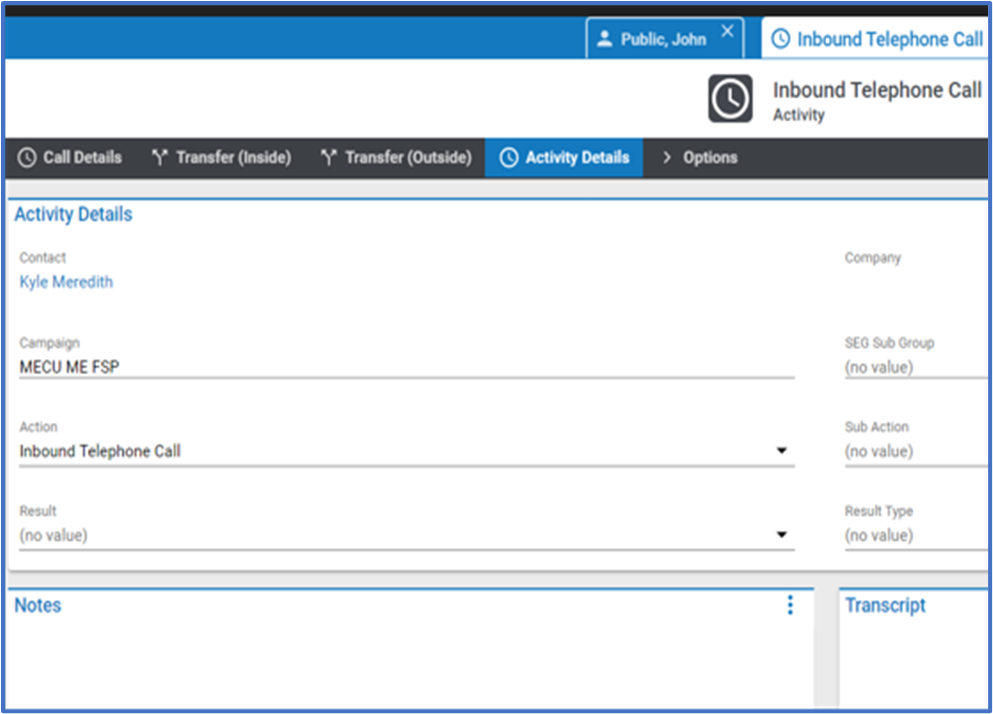
Step 8: Schedule a Follow-Up (If Needed)
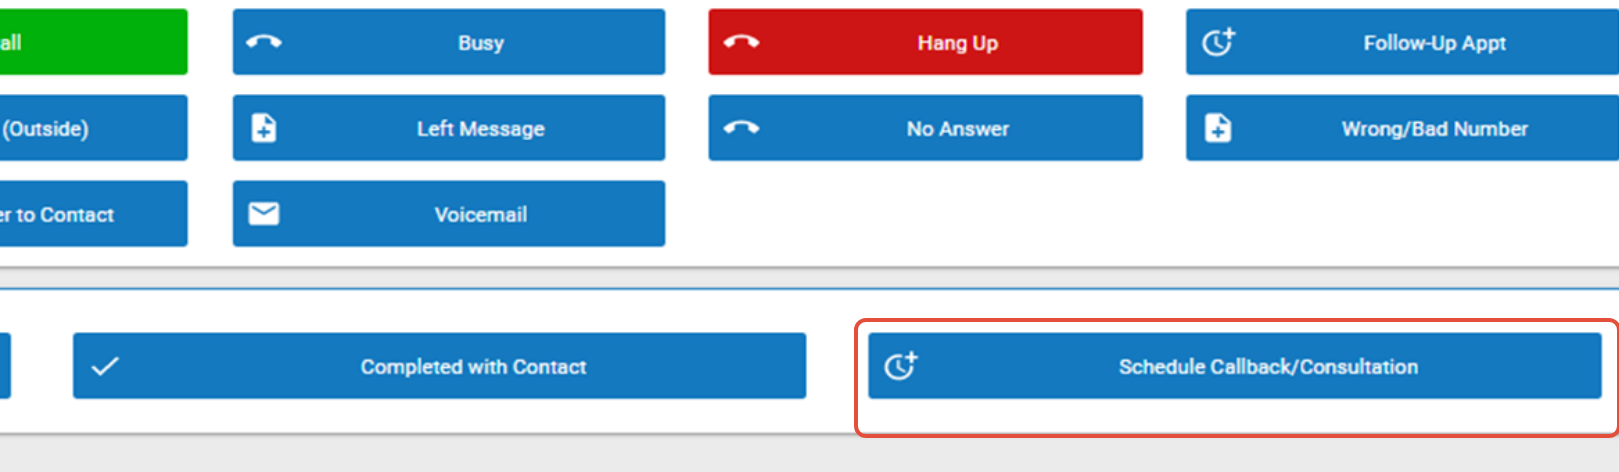
- From the call screen, click Scheduled call back, pick a date/time, and save.
- If not on a live call, create a new Scheduled Call Back activity from the profile.
Extras During Annual Reviews
- CU Product Interest: Log requests for loans, cards, etc.
- Referrals: Use the clipboard icon to create and schedule follow-up.
- Transfers: Always do a warm transfer if possible.
- Note Templates: Save frequently used notes for faster documentation.
Quick Troubleshooting
- Wrong script? Switch it from the dropdown.
- CTI error? Update CTI password in the drawer.
- Script missing? Make sure you’re connected to VPN and in Production.
Annual Review Checklist
- VPN connected, CTI synced
- Annual Review script loaded
- Member info verified
- Policies reviewed
- Beneficiaries, payments, riders checked
- Activity completed with Action, Result, Notes
- Follow-up scheduled if needed